Wednesday, October 12, 2016

Thermomix Sous Vide Cheesecake


These are Freakin' Amazing!
Earlier this week I spotted a post on a sous vide group about sous vide cheesecake. The original poster didn't show a recipe so I thought I would post the one I use. The cheesecake batter is based on a 1979 Gourmet Magazine recipe for New York style cheesecake.


So here we go:

First: Clean and sterilize 6 half pint wide mouth Mason jars with their lids and preheat your water bath to 80° C.

Step 1: Make the Graham Cracker Crust

Yep, that's six - you only need five

Graham Cracker Crust

Ingredients
  • 5 Graham Crackers
  • 25 Grams Sugar
  • 60 Grams Butter
Cooking Directions
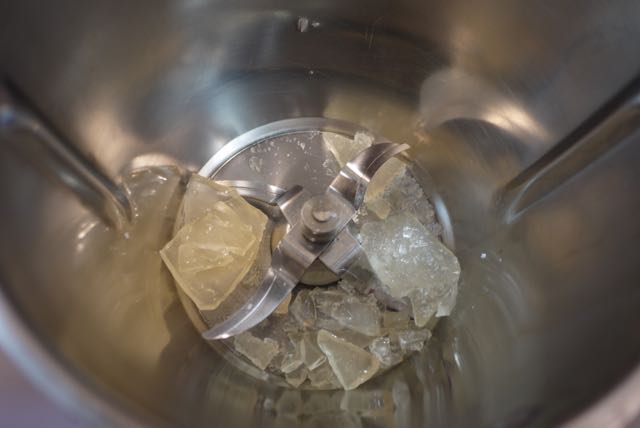
  1. Tare the butter and sugar into the Thermomix bowl and process at 50° C until the butter is melted and the sugar well combined.
  2. There's Butter Down In There...
  3. Break up the Graham Crackers and add to the butter mixture. Process on Speed 5 until ground to a coarse meal texture. If it doesn't hold together when you squeeze some in your hand, just add a little more melted butter.
  4. Transfer the mixture to a bowl and set aside.
  5. Clean and dry the Thermomix bowl.
Step 2: Make the Cheesecake Batter


Cheesecake Batter

Ingredients
  • 25 grams Butter
  • 220 Grams Ricotta
  • 220 Grams Philadelphia Cream Cheese (1 pkg.), cut up
  • 150 Grams Sugar
  • 2 Large Eggs
  • 15 grams AP Flour
  • 15 Grams Corn Starch
  • 1.5 tsp.Vanilla  Extract
  • 220 Grams Sour Cream
Cooking Directions
  1. Tare the butter into the Thermomix bowl and melt at 50° C, Speed Stir.
  2. Tare the ricotta, cream cheese, and sugar into the bowl and process on Speed 4 until well combined, about 15-20 seconds. Scrape down the sides of the bowl.
  3. Add the eggs and process on Speed 4 until well combined. Scrape down the sides of the bowl.
  4. Tare in the flour, cornstarch, and vanilla and process on Speed 4 until well combined. Scrape down the sides of the bowl and ensure than none of the dry ingredients are stuck to the top of the blades.
  5. Tare in the sour cream and process on Speed 4 until the mixture is perfectly smooth.
Step 3: Assemble the Cheesecakes


Divide the Graham Cracker mixture among the 6 Mason jars, pressing it down with your fingers.


Pour in the Cheesecake batter leaving a half inch head space. This is important as the mixture will expand as it cooks and you don't want to have to clean cheesecake goop out of your circulator.

Carefully wipe the rims and seal the jars "hand tight". This is actually just a little tighter than you would for pressure canning.


If you have some left over batter, just add it to another jar.


Gently drop the jars into the preheated water bath and cook for 2 hours. Note that as they warm up you'll see some bubbles as the air and cheesecake mixture expands. You're OK as long as you left a head space.


Carefully remove the jars and place them on a towel to cool for an hour. Mason Jars are tough but they can't handle quick temperature changes. Pop them into the refrigerator until completely chilled, then open, garnish and enjoy!

Have A Bite!


Sunday, October 2, 2016

Gelato alla Crema!

Mmmmm... Gelato!
So, is gelato hard to make at home? Well... You do need to be careful, maybe have a instant read thermometer, and be willing to stir carefully for about half an hour while the custard base comes up to temperature. Or...

If you have a Thermomix the whole prep and cooking part takes about 15 minutes. And now that Thermomix is finally available in the United States, you can also (for now) buy cool European TMX cookbooks like this one:

So... how's it go?

The recipe is super simple:

Ingredients

1 Tbs Vanilla Paste (or the seeds from 1 vanilla bean)
250 grams whole milk
250 grams cream
170 grams sugar
4 egg yolks


Dump everything into the Thermomix bowl and cook at 85° C for 7 minutes. My Thermomix is the older TM-31 that works in 10° increments so I went with 90° which worked perfectly.


Then pour the custard into a container and pop it into the 'fridge for a couple hours.

Just takes a minute to start to freeze...
Once the custard has cooled, pour it into your trusty ice cream maker for about 30 minutes.

Half an hour later...
And into the freezer..
Scoop it all out into another container and freeze for a couple hours. Gelato should be pretty soft so if you go overnight, take it out and let it loosen up in the refrigerator for an hour or so before serving.

At our house there is no "overnight" waiting allowed... We sucked down a couple scoops each after about 90 minutes and it turns out that cats like to lick the bowls!


Chocolate version coming soon!


Wednesday, September 21, 2016

Pokemon GO and the American Swedish Historical Museum!


So last Tuesday Beth and I decided to expand our Pokemon GO activities to  FDR Park in south Philadelphia. Quite apart from the opportunity to catch a bunch of Charmanders, the park is also home to the American Swedish Historical Museum. Anyone who knows me will realize that the opportunity to visit a small, specialized museum could not be missed!

FDR Park is in *way* south Philadelphia! In fact it's at the end of the Broad Street Line along with the various sports venues where Philly teams mostly fail to achieve championships. The park itself is pretty nice in a semi run-down sort of way (like a lot of Philly that's not in the tourist center). 

There's a medium size artificial lake with a boat house and a gazebo...
 

You can rent the paddle boats on days when we weren't there...


And a path that runs all the way around where dog owners fail to pick up their puppy's poop... Fishing is allowed and there are tennis courts and playgrounds for the kiddies.

But the real cool place is the museum! How 'bout an actual Viking Sword?


 Iron doesn't hold up too well - you can probably just see the supporting material (sort of light brown) under the blade...

There's some more recent stuff as well, like this:


This is in the John Ericsson room. That's Abe Lincoln signing off on the Monitor and the Naval big-wigs agreeing... He also designed the first "screw" type propeller steamship to cross the Atlantic. Along with a METRIC-FUCK-TON (technically) of other stuff that wasn't recognized - so he wrote an enormous book (displayed at the right under the Monitor) detailing his creations.


Did you know Swedes like to drink? There's a nifty collection of sliver tankards here.

And of course there's plenty of "folk art". These mangle boards were apparently made by young men to impress their girlfriends with the opportunity to iron their shirts...


Beth's Dad was an enthusiastic wood carver, but I'm pretty sure this wouldn't have worked with her Mom.

This on the other hand...


is a carved stool made from a tree stump or log. It's part of an exhibit of carved funriture  by

Karl von Rydingsvärd (though not by him - it's context).

This desk is:


And yes, there's a room dedicated to Jenny Lind, as well as Fredrika Bremer, and of course Pippi Longstocking has a spot in the kiddie's room. 

This was a great day out! Now that I'm retired I have time to research these things and find cool places Beth and I can visit on her days off.

You Minnesota Folk Know What This Is


Saturday, September 17, 2016

El Bulli Fun!: 1671 Apple Mojito Sandwich And 1741 Duck Foie Gras Tartlet

1671 Apple Mojito Sandwich
1741 Duck Foie Gras Tartlet
 It's been a good long while since I've done an  El Bulli recipe! A couple days ago someone came across my old El Bulli At Home blog and asked about a couple recipes. The principal interest was an older item that shows up as "White Chocolate English Bread" but in the catalogs is most likely 2003's 944 "Frozen White Chocolate Air".

The other recipe we talked about was this one: the Apple Mojito Sandwich. The ElBulli version uses liquid nitrogen to freeze the mojito granita, but it can easily be made in a regular ice cream freezer. And then, since I was poking around in the 2010-2011 book I decided to do an old favorite I never managed to write up.

As usual with published recipes, these are not mine to re-publish. If you're interested in trying one feel free to PM me.

Day One: Methylcellulose Base and Apple Mojito Granita

Methylcellulose needs to be dissolved at a relatively high temperature (90° C) so this part is perfect for the Thermomix. Just warm up 200 grams of water, add 6 grams of methylcellulose and mix until dissolved.


That goes into into the fridge overnight to hydrate. Then on to the apple juice for the meringues and the granita.


Juice about a kilo of apples for the meringue bases. If you've used a juicer you know that a good deal of fine particulate matter is mixed up in the foam on top of the juice. To clarify the juice it just goes in the freezer for about half an hour...


And you can scoop the frozen foam right off! That juice goes into the fridge and another batch of apples gets juiced for the granita.

At elBulli the granita was made immediately before serving using liquid nitrogen. Since I don't have easy access to small quantities of liquid nitrogen I decided to give it a shot using my trusty ice cream freezer. Making the mojito granita base is easy:

Mint leaves, Rum, Xanthan Gum & Apple Juice
Everybody into the pool:


It does take a few minutes with the immersion blender to get the texture smooth enough. Then into the ice cream freezer and half an hour later:


I will say this: that is just about the most intense mint flavor you can imagine.

Day Two: Meringue "Baguettes"


Xanthan Gum, Egg White Powder, Wheat Fiber (a.k.a. wheat dextrin, Trisol and in the USA, Benefiber), Apple Juice, and methylcellulose solution ready to go. All but the smaller portion of the xanthan gum gets whizzed together and a small portion of that mixture is reserved. Then the remaining xanthan is added and whizzed again. Both go into the refrigerator for a few hours...


The larger portion is whipped to stiff peaks, the smaller added and whipped again. If anyone can explain the reason for this procedure I'd love to know.

I'm no good at piping
The meringue gets piped onto silicone sheets and into the dehydrator for 24 hours

Day Three: Assembly and Consumption

Nothing much to this, just very carefully lift the meringue "baguettes" from the dehydrator sheets, apply the granita and eat. Mine came out almost hollow so instead of trying to split them, I just used two for each sandwich:


And away we go!


How's It Taste?

This are pretty tasty. The mojito granita is very intense and the meringue has only the slightest hint of the apple flavor.

Duck Foie Gras Tartlet

This one uses a pair of El Bulli favorites: obulato sheets and a simple caramel made with fondant, glucose, and isomalt. Those two items appear in quite a number of recipes from these years - you can find two I've tried on the El Bulli At Home blog here and here.


You start by very gently cooking the foie, just until it's warmed through and lightly colored. Then wrap it tightly in plastic film and foil and pop it into the freezer for a few hours.

Meanwhile I heated the oven to 170° C and prepped the obulato sheets. El Bulli used circular sheets but since I have square ones, that's what I used.


A few chunks of caramel turn into powder quickly in the Thermomix which is then dusted onto the obulato sheets:


Into the oven for a minute and they're done.


You do have to lift them off pretty quickly or the overflow caramel glues them all together. When that happens it just takes a couple seconds back in the oven to remelt everything. I stored the sheets in a little plastic food container separated with sheets of parchment paper.


To finish these little guys I grated the frozen foie gras using a microplane grated and Boom! Foie Gras Tartlet!

How's it Taste?

These are great! The El Bulli caramel is just barely sweet and the crispness of the obulato makes a nice contrast to the smooth foie. This is a marvelous little "amuse" that takes almost no actual work in the kitchen. We'd serve this pretty much anytime.

These were quite a bit of fun to make and neither one required any special skills or kitchen magic.

Sunday, September 4, 2016

What A Week! - Part 1

Explanation Later!
This being retired is a lot busier than I expected! Seems that once you have time to do things, "things" magically appear to be done. So last week's "thing" was a quick mini-trip down to Cocoa Beach, FL to watch a test firing of a Trident missile from our son's submarine, SSBN 738 Maryland.

Orlando is about a two and a half hour flight from Philadelphia so it wasn't too bad in cattle class, especially since I had an aisle seat going down and exit row on the way back. Only cost $11.20 since we had loads of miles to use. To make things even cheaper I was able to stay at the "event" hotel at the Navy group rate, saving another couple hundred bucks.


The event itself was a long, long day starting well before dawn with a bus ride out to the port where we boarded the USNS Waters, a converted cold war relic that now supports a variety of submarine research tasks.

After boarding the waiting began. Fortunately they kept us well fed and once his basic duties were complete I was able to spend almost the whole day with our son, meet some of his shipmates and a few of their parents as well.

Since the Waters' top speed is something like 13 knots it took a good long time to reach the launch area. While we sailed the ship's crew kept the food coming - lunch was in the crew's mess and was very good. Will has plenty of experience with the Navy's submarine food (said to be the best in the Navy) and allowed that the civilian operated Waters's fare was much better.

We eventually reached the launch site and sort of tooled around the area while the Maryland got ready to launch. Will and I were waiting just aft of the orange lifeboats you can see in the picture above.

About a minute or so before launch the Maryland sent up a smoke flare and the countdown began. It was pretty cool in a "this is how the end of the world starts" kind of way. For obvious reasons we couldn't take pictures or or record the event but there are plenty of official videos out there:


After the test there was more food as we headed back to port. Will and I hung out in the ship's theater for a while where they were running a full set of Star Wars movies. While were were lounging the Waters' mess crew set up a humongous barbecue on the open aft area of the ship. Steaks, brats burgers, big chunks of (I think) sea bass, and all the the other stuff... And then the rain started thanks to then tropical storm Hermine. The cooks kept at it and produced a terrific steel beach picnic.

By now pretty much everyone was exhausted and we still had a couple hours 'till we made port. Fortunately, Will knew of a compartment with TV and La-Z-Boys (and air conditioning) so we went down there to watch some sports TV (ESPN-U I think - it was all college football).

Well after my bed-time we made it back to port and the buses took us back to the hotel. I'd gotten a "two queens" room and Will got permission to stay over in a comfortable hotel bed and making the next day's connections much more convenient.

The next day we headed out to the Kennedy Space Center, which turned out to be more interesting than we expected, in an unexpected way...


Wednesday, July 20, 2016

Volver Summer School: Paella


It's been a while since I've had time to post so apologies for that in case anyone has been looking.

So... last week we went to one of Chef Jose Garces' Summer School classes; this one on making paella. As you might expect from the signage above, the class was held at Volvér, his restaurant in the Kimmel Center. Like the classes at Vetri it was limited to 12 participants.


It was led by Volvér's Chef de Cuisine David Conn assisted by Chef Steve Kim of Amada. Chef Conn has been with the Garces Group from the start and during the class discussed how their approach to paella had evolved over the years.

Bocadillos - Part 1

Traditionally, a bocadillo is a sandwich served on a bread cut lengthwise rather than sliced. More recently the term has come to mean pretty much anything delivered on bread, much like the Italian crostini. At Volvér we attendees made the ingredients two: Tomato Bocadillos and Tuna Tartare Bocadillos.


Working in four teams we put together the various pieces:

  • Saffron Aioli
  • Chorizo Aioli
  • Goat Cheese Mousse
  • Guindilla Escabeche

Beth and I did the Chorizo Aioli:

Lemon Juice, Roasted Garlic, Smoked Paprika, Espelette Pepper, & Chorizo Oil


Six egg yolks whisked, and whisked, and whisked with the other ingredients. Then more whisking as we drizzled in that whole container of Chorizo Oil. The folks down at the far end making the goat cheese mousse had it easy - dump everything in the food processor and push the button!

The Paella
Preparing the Paella

Once we had the bocadillos ingredients ready Chef Conn ran down the paella process. At Amada they simplify making paella by preparing everything in advance except the rice (in the beginning they tried par-cooked rice but quickly abandoned the idea as the quality of the paella suffered). For home cooks there's probably a good couple hours of prep:
  • Make Saffron Chicken Stock
  • Poach Chicken Thighs for the Chicken Ropa
  • Prepare the Chicken Ropa Sauce
  • Finish the Ropa
  • Grill the Chorizo
  • Prepare the other Paella Ingredients


Meanwhile Chef Kim was sauteing onions and chorizo in the paella pans and quickly toasting the rice.


Wet ingredients added, he covered the pans with foils and popped 'em into the oven for about 20 minutes...

Bocadillos - Part 2

While the paella cooked we went back to assembling the bocadillos.


On the left are the cherry tomatoes with goat cheese mousse; they're topped off with a picnch of chopped, toasted Marcona almonds. On the right is the tuna tartare in Guandilla Escabeche. Those should have been topped with the Chorizo Aioli, but after the first one, I decided it was too spicy for me. Turns out I didn't have to worry about getting enough - they provided 2 or 3 times as much as was strictly needed. But you know what mom always said: "Don't fill up on bread!"

By the time we got through the bocadillos and a couple glasses of wine the paella was ready:


The finished paella included roast chicken breast, bread (or toast) slathered with that Saffron Aioli and a simple herb salad to cut the richness of the paella. We finally sat down to drink some more wine and devour the paella. Even with 12 hungry paella fans there was enough for seconds if you wanted them.

We've been going to these cooking classes for a couple years now (you can check out my review of the Vetri Pizza class back on the old blog). They're always interesting and fun and the always-late SEPTA night trains help metabolize the free-flowing wine.

This was a terrific class on an intimidating topic. We're both looking forward to next year's series.