Showing posts with label thermomix. Show all posts

Wednesday, October 12, 2016

Thermomix Sous Vide Cheesecake


These are Freakin' Amazing!
Earlier this week I spotted a post on a sous vide group about sous vide cheesecake. The original poster didn't show a recipe so I thought I would post the one I use. The cheesecake batter is based on a 1979 Gourmet Magazine recipe for New York style cheesecake.


So here we go:

First: Clean and sterilize 6 half pint wide mouth Mason jars with their lids and preheat your water bath to 80° C.

Step 1: Make the Graham Cracker Crust

Yep, that's six - you only need five

Graham Cracker Crust

Ingredients
  • 5 Graham Crackers
  • 25 Grams Sugar
  • 60 Grams Butter
Cooking Directions
  1. Tare the butter and sugar into the Thermomix bowl and process at 50° C until the butter is melted and the sugar well combined.
  2. There's Butter Down In There...
  3. Break up the Graham Crackers and add to the butter mixture. Process on Speed 5 until ground to a coarse meal texture. If it doesn't hold together when you squeeze some in your hand, just add a little more melted butter.
  4. Transfer the mixture to a bowl and set aside.
  5. Clean and dry the Thermomix bowl.
Step 2: Make the Cheesecake Batter


Cheesecake Batter

Ingredients
  • 25 grams Butter
  • 220 Grams Ricotta
  • 220 Grams Philadelphia Cream Cheese (1 pkg.), cut up
  • 150 Grams Sugar
  • 2 Large Eggs
  • 15 grams AP Flour
  • 15 Grams Corn Starch
  • 1.5 tsp.Vanilla  Extract
  • 220 Grams Sour Cream
Cooking Directions
  1. Tare the butter into the Thermomix bowl and melt at 50° C, Speed Stir.
  2. Tare the ricotta, cream cheese, and sugar into the bowl and process on Speed 4 until well combined, about 15-20 seconds. Scrape down the sides of the bowl.
  3. Add the eggs and process on Speed 4 until well combined. Scrape down the sides of the bowl.
  4. Tare in the flour, cornstarch, and vanilla and process on Speed 4 until well combined. Scrape down the sides of the bowl and ensure than none of the dry ingredients are stuck to the top of the blades.
  5. Tare in the sour cream and process on Speed 4 until the mixture is perfectly smooth.
Step 3: Assemble the Cheesecakes


Divide the Graham Cracker mixture among the 6 Mason jars, pressing it down with your fingers.


Pour in the Cheesecake batter leaving a half inch head space. This is important as the mixture will expand as it cooks and you don't want to have to clean cheesecake goop out of your circulator.

Carefully wipe the rims and seal the jars "hand tight". This is actually just a little tighter than you would for pressure canning.


If you have some left over batter, just add it to another jar.


Gently drop the jars into the preheated water bath and cook for 2 hours. Note that as they warm up you'll see some bubbles as the air and cheesecake mixture expands. You're OK as long as you left a head space.


Carefully remove the jars and place them on a towel to cool for an hour. Mason Jars are tough but they can't handle quick temperature changes. Pop them into the refrigerator until completely chilled, then open, garnish and enjoy!

Have A Bite!


Sunday, October 2, 2016

Gelato alla Crema!

Mmmmm... Gelato!
So, is gelato hard to make at home? Well... You do need to be careful, maybe have a instant read thermometer, and be willing to stir carefully for about half an hour while the custard base comes up to temperature. Or...

If you have a Thermomix the whole prep and cooking part takes about 15 minutes. And now that Thermomix is finally available in the United States, you can also (for now) buy cool European TMX cookbooks like this one:

So... how's it go?

The recipe is super simple:

Ingredients

1 Tbs Vanilla Paste (or the seeds from 1 vanilla bean)
250 grams whole milk
250 grams cream
170 grams sugar
4 egg yolks


Dump everything into the Thermomix bowl and cook at 85° C for 7 minutes. My Thermomix is the older TM-31 that works in 10° increments so I went with 90° which worked perfectly.


Then pour the custard into a container and pop it into the 'fridge for a couple hours.

Just takes a minute to start to freeze...
Once the custard has cooled, pour it into your trusty ice cream maker for about 30 minutes.

Half an hour later...
And into the freezer..
Scoop it all out into another container and freeze for a couple hours. Gelato should be pretty soft so if you go overnight, take it out and let it loosen up in the refrigerator for an hour or so before serving.

At our house there is no "overnight" waiting allowed... We sucked down a couple scoops each after about 90 minutes and it turns out that cats like to lick the bowls!


Chocolate version coming soon!


Saturday, September 17, 2016

El Bulli Fun!: 1671 Apple Mojito Sandwich And 1741 Duck Foie Gras Tartlet

1671 Apple Mojito Sandwich
1741 Duck Foie Gras Tartlet
 It's been a good long while since I've done an  El Bulli recipe! A couple days ago someone came across my old El Bulli At Home blog and asked about a couple recipes. The principal interest was an older item that shows up as "White Chocolate English Bread" but in the catalogs is most likely 2003's 944 "Frozen White Chocolate Air".

The other recipe we talked about was this one: the Apple Mojito Sandwich. The ElBulli version uses liquid nitrogen to freeze the mojito granita, but it can easily be made in a regular ice cream freezer. And then, since I was poking around in the 2010-2011 book I decided to do an old favorite I never managed to write up.

As usual with published recipes, these are not mine to re-publish. If you're interested in trying one feel free to PM me.

Day One: Methylcellulose Base and Apple Mojito Granita

Methylcellulose needs to be dissolved at a relatively high temperature (90° C) so this part is perfect for the Thermomix. Just warm up 200 grams of water, add 6 grams of methylcellulose and mix until dissolved.


That goes into into the fridge overnight to hydrate. Then on to the apple juice for the meringues and the granita.


Juice about a kilo of apples for the meringue bases. If you've used a juicer you know that a good deal of fine particulate matter is mixed up in the foam on top of the juice. To clarify the juice it just goes in the freezer for about half an hour...


And you can scoop the frozen foam right off! That juice goes into the fridge and another batch of apples gets juiced for the granita.

At elBulli the granita was made immediately before serving using liquid nitrogen. Since I don't have easy access to small quantities of liquid nitrogen I decided to give it a shot using my trusty ice cream freezer. Making the mojito granita base is easy:

Mint leaves, Rum, Xanthan Gum & Apple Juice
Everybody into the pool:


It does take a few minutes with the immersion blender to get the texture smooth enough. Then into the ice cream freezer and half an hour later:


I will say this: that is just about the most intense mint flavor you can imagine.

Day Two: Meringue "Baguettes"


Xanthan Gum, Egg White Powder, Wheat Fiber (a.k.a. wheat dextrin, Trisol and in the USA, Benefiber), Apple Juice, and methylcellulose solution ready to go. All but the smaller portion of the xanthan gum gets whizzed together and a small portion of that mixture is reserved. Then the remaining xanthan is added and whizzed again. Both go into the refrigerator for a few hours...


The larger portion is whipped to stiff peaks, the smaller added and whipped again. If anyone can explain the reason for this procedure I'd love to know.

I'm no good at piping
The meringue gets piped onto silicone sheets and into the dehydrator for 24 hours

Day Three: Assembly and Consumption

Nothing much to this, just very carefully lift the meringue "baguettes" from the dehydrator sheets, apply the granita and eat. Mine came out almost hollow so instead of trying to split them, I just used two for each sandwich:


And away we go!


How's It Taste?

This are pretty tasty. The mojito granita is very intense and the meringue has only the slightest hint of the apple flavor.

Duck Foie Gras Tartlet

This one uses a pair of El Bulli favorites: obulato sheets and a simple caramel made with fondant, glucose, and isomalt. Those two items appear in quite a number of recipes from these years - you can find two I've tried on the El Bulli At Home blog here and here.


You start by very gently cooking the foie, just until it's warmed through and lightly colored. Then wrap it tightly in plastic film and foil and pop it into the freezer for a few hours.

Meanwhile I heated the oven to 170° C and prepped the obulato sheets. El Bulli used circular sheets but since I have square ones, that's what I used.


A few chunks of caramel turn into powder quickly in the Thermomix which is then dusted onto the obulato sheets:


Into the oven for a minute and they're done.


You do have to lift them off pretty quickly or the overflow caramel glues them all together. When that happens it just takes a couple seconds back in the oven to remelt everything. I stored the sheets in a little plastic food container separated with sheets of parchment paper.


To finish these little guys I grated the frozen foie gras using a microplane grated and Boom! Foie Gras Tartlet!

How's it Taste?

These are great! The El Bulli caramel is just barely sweet and the crispness of the obulato makes a nice contrast to the smooth foie. This is a marvelous little "amuse" that takes almost no actual work in the kitchen. We'd serve this pretty much anytime.

These were quite a bit of fun to make and neither one required any special skills or kitchen magic.

Tuesday, June 23, 2015

Tuesday Booze Day - New Horizons!


You want these - Horror In Clay
Those of you who know me know I enjoy the occasional adult beverage. I've been mostly a scotch and beer kinda guy with wine associated with particular dishes I've cooked. Lately though I've been thinking that with more time on my hands in the near future I should start expanding my beverage repertoire. So when I started seeing H. P. Lovecraft, and Edgar Allan Poe inspired Tiki mugs on Kickstarter I knew what direction I had to take!

Falernum #9

Falernum is a clove, lime and almond infused rum mixture that shows up in dozens of Tiki drink recipes. There are commercial versions available, but since it's not hard to make your own...


Falernum #9
Recipe by Paul Clarke
Ingredients
  • 180 ml Wray & Nephew White Overproof Rum
  • 9 Whole Limes, zested, the juice reserved
  • 40 Whole Cloves
  • 42 grams Fresh ginger, julienned
  • 28 grams Slivered almonds, toasted
  • 415 ml 2:1 Simple Syrup
  • 1 dash Almond extract
  • 135 ml Fresh Lime Juice
Cooking Directions
  1. Place the lime zest, cloves, ginger, and almonds into a superbag.
  2. Place the rum in a Ball jar, immerse the spice bag, and seal the jar. (Or just toss 'em all in and strain later.)
  3. Allow the mixtures to infuse for 24 hours.
  4. After 24 hours, remove the spice bag and squeeze as much liquid into the jar as possible.
  5. Add the simple syrup, almond extract, and lime juice to the infused rum.
  6. Seal, shake well, and use in your favorite Tiki drinks.
  7. Falernum #9 will keep refrigerated for up to a month.


I'm still collecting ingredients for my first real Tiki drink, so in the meantime here's a healthy morning smoothie:

Banana Daiquiri
Recipe by William Colsher
Yield: 2 Servings
Ingredients
  • 30 ml Fresh Lime Juice
  • 30 ml Simple Syrup
  • 90 ml Gold Puerto Rican Rum
  • 1 Ripe Banana, Sliced
  • 230 grams Ice
Cooking Directions
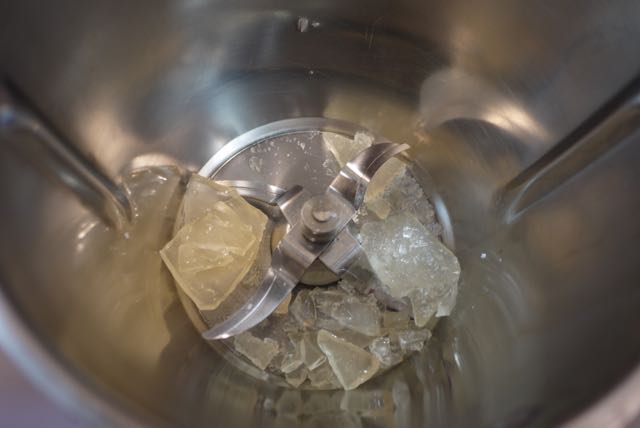
  1. Tare the ice into the Thermomix bowl.
  2. Add the rest of the ingredients.
  3. Process at speed 8 for about 20 seconds.
  4. Pour into glasses and enjoy.